Saturday, 27 February 2021

Pyro

Hello and welcome back. 


Isn’t it typical? You wait about for a post for weeks and then three come along at once! The horde of Immortan Ork has a new warboy - Pyro. 


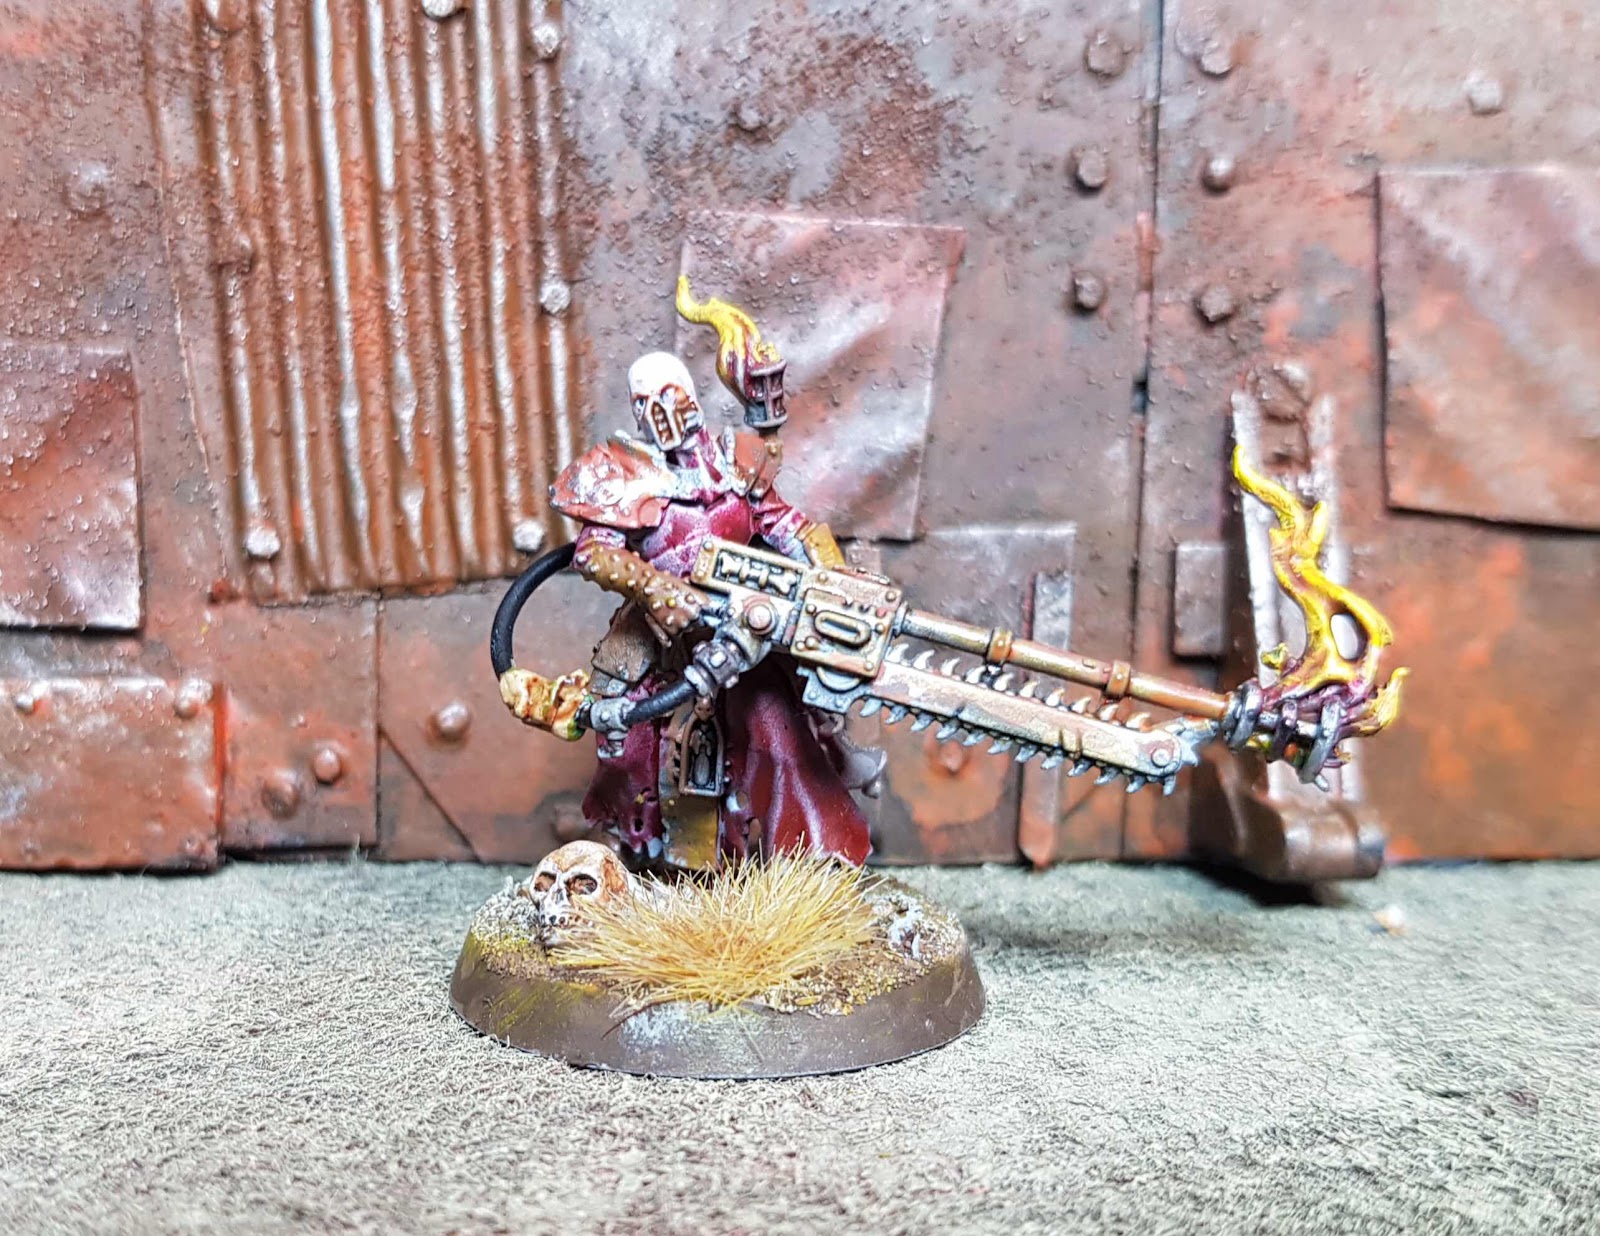
Pyro got his name because of his fascination with fire. He built his own custom flame thrower and chainsaw combi weapon. Thrust into the front ranks of the warboys Pyro has proven himself the flamethrower torching mutant swarms, charging crazies and dealing with vehicles with ease. 


Pryo is a Pious Vorne figure from the Blackstone Fortress set. I trimmed the spikey bits off the figure and slapped a bit of putty over the shoulder pad. There was a gap in it. 


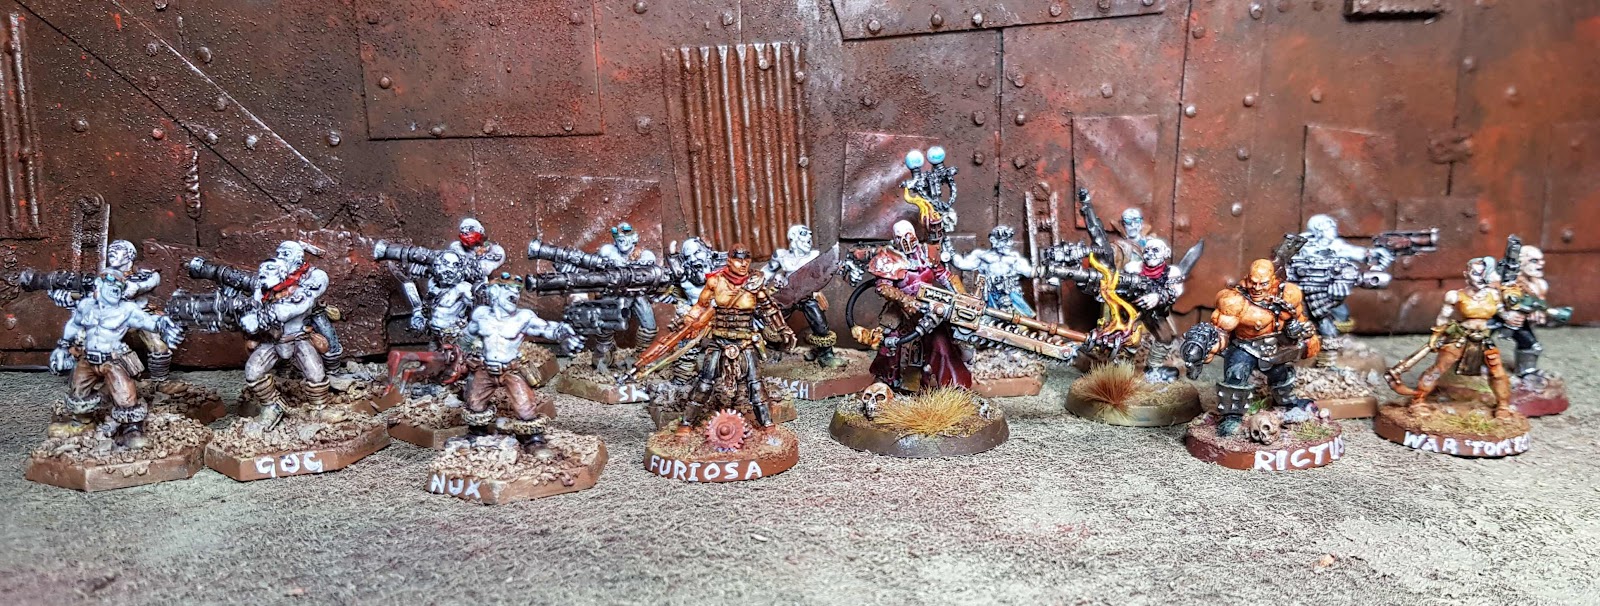
The Warboy horde so far. I didn’t realise it had gotten that big. 


Thanks for looking. WITNESS! 

Stargrave Pirates or Star B**tards??

Hello out there! 


Back in the midsts of time, in the year 2018 there was a group project on the Oldhammer forum to create “Star Bastards”. The aim was to create a rag rag groups of Space Marines that had spent their entire lives caught up on the front line. As front line units they should have mismatched, patched up armour and equipment. The plan was to have them ready for Bring Your Own Lead 18 where a mass battle was planned as they invaded Helsreach for some RnR. 


As I like to use all my figures for my Post Apocalyptic setting Mattblackgod’s world I was going to rebrand them as the “Bunker Bustards” and have them as a team of bunker raiders, hence all the cool kit they sport. They will still see action on Mattblackgod’s world in this function.


Assembly begun but sadly I couldn’t get them finished in time for BOYL 18. They sat languishing in a box until last year when I finished assembly and conversion. There was a deep bits box raid grabbing heads and parts from many 3rd party bits suppliers. I even managed to get them primed.  

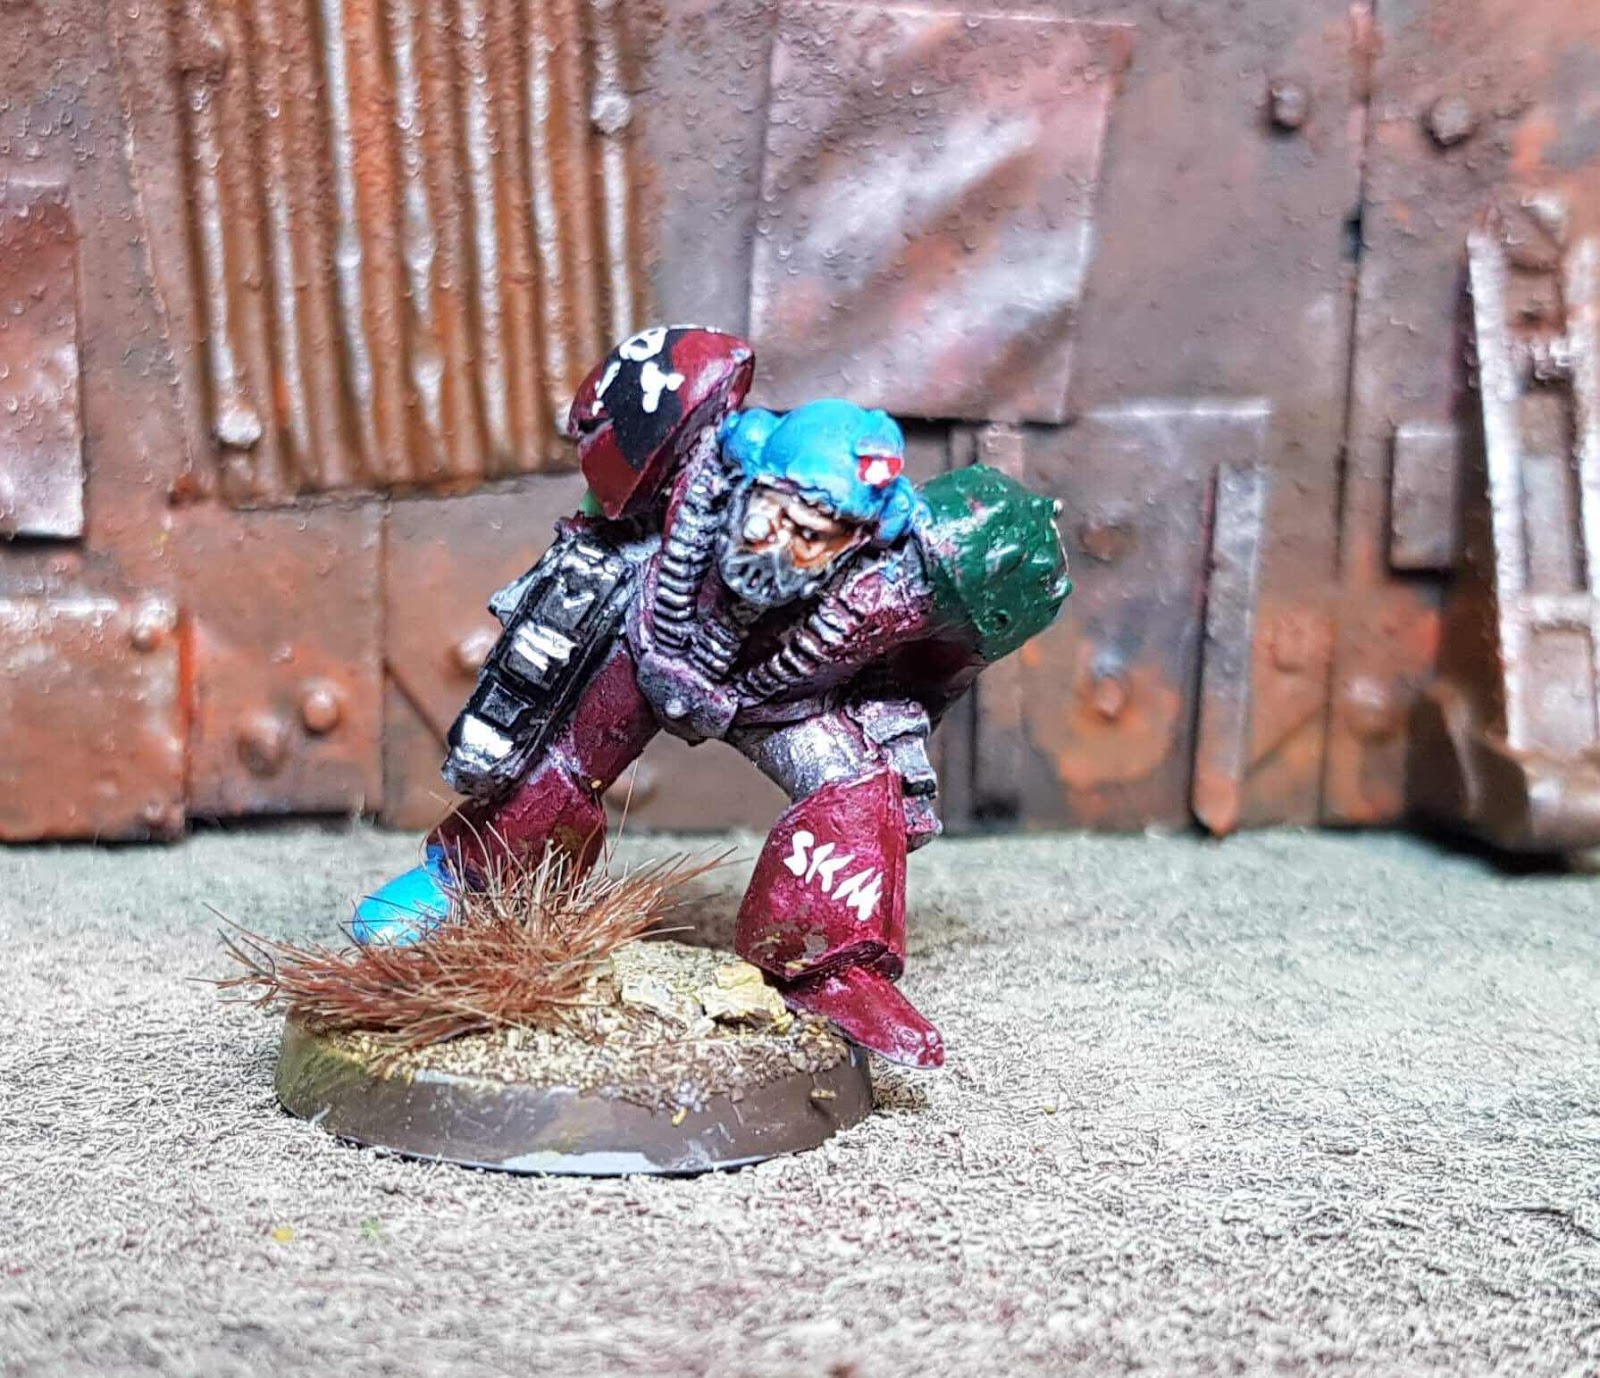
This figure was a metal beakie marine. I carefully shaved the mask off and trimmed a Iron Pig head to fit into the hole. I hated the pose of the original figure (a Rhino rider) so I lopped the offending arm off and replaced it with a spare plastic arm. 


Early this year I begun to see blog posts by about the forthcoming Stargrave game. I realised these guys would make great Space Pirates for Stargrave. I ditched the military colours and rust pain scheme I had planned and went for something more (40K) Space Mariney. As these guys are pirates I went for a mismatched colour scheme with a fair bit of owner customisation & graffiti. The shoulder pads have a stylised skull and crossbones painted on them. 

The guy on the left has a later Space Wolves head and a set of mechanical legs intended for a Ork. I can’t recall the manufacturer. The guy on the right has a aftermarket head and a wolf pelt from the space wolves. 


The figures are all classic Space Marines that I have converted. Mainly plastics with a metal figure thrown in. 


The dude with the skull face mask is a old favourite of mine, painted back in the midsts of time (c1988) with the old update over the decades. He is intended as the gang’s leader. 


Thanks for reading and stay safe out there. 

Xenomorphs! Aliens!

Hello and welcome back, 


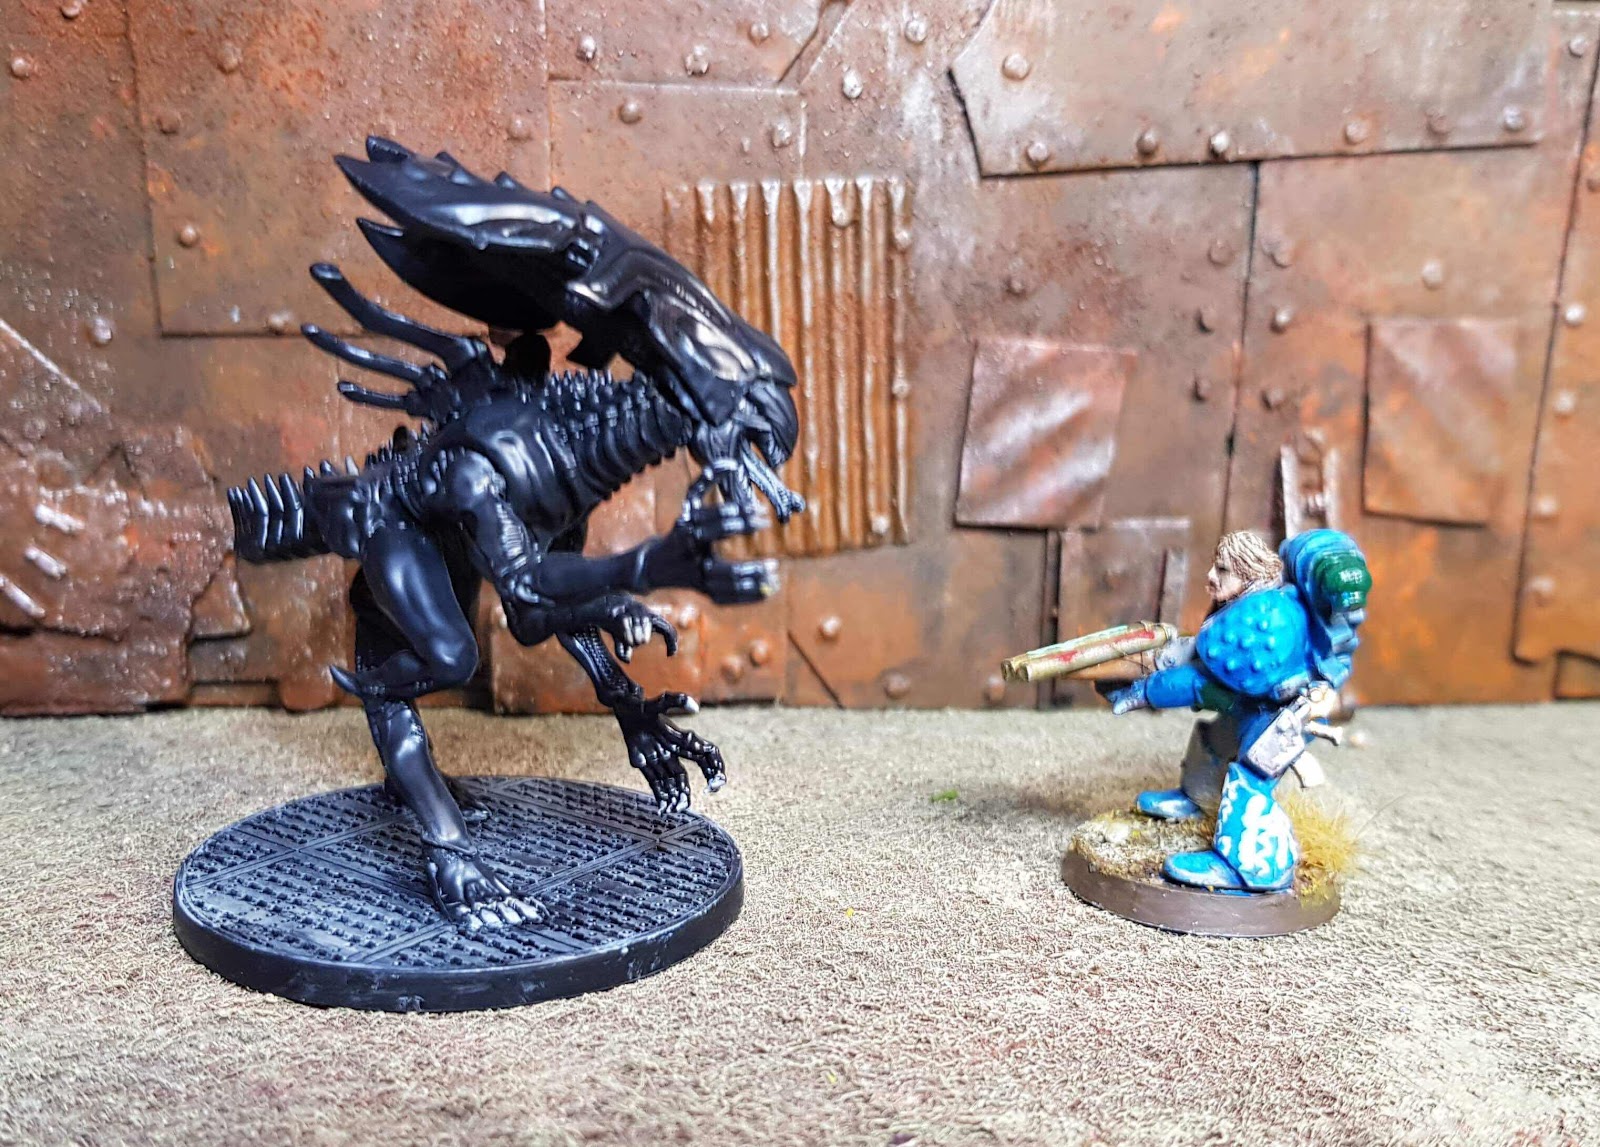
As you may have read earlier this year I bought some Aliens/Xenomorphs by Galeforce 9. I fancied they would create some interesting problems for the inhabitants of Mattblackgod’s world (as if they didn’t have enough problems). It has also occurred to me that these critters maybe useful for the game “Stargrave”. 


The Queen went together easily. The warriors was a bit more challenging especially for my fat sausage fingers. Their tails where particularly fiddly, needing time for the glue to set. I ended up using piles of coins to rest the figures on. 


Paint wise I decided just to touch up the details, as the figures are gloss black and Xenomorph aliens tend to be gloss black. 


Thanks for looking and nuke the site from orbit.


Take care out there.


Saturday, 6 February 2021

Still alive and kicking

Picture from Metro Exodus game.

Hello, out there.


Just a quick post to say that I am still alive. February already, where does the time go? Winter hasn’t yet gone away but hopefully spring isn’t too far away. 


Life has been insanely busy juggling work and  running my wife’s daily treatments. Work isn’t helping too much especially as it is now one man doing the work of three, trying to catch up on 12 months backlog of work. Sadly there is no sign of any help on the horizon. Despite all this you will be glad to know that I have managed to get some hobby time in. 


Mainly working on odds and ends for the forthcoming Stargrave game which I am looking forward to. I am also working on assorted figures from MEP miniatures for my Post Apocalyptic setting. 


As soon as I get some figures & models finished I will be posting them up. 


Stay safe and take care out there. 


Sunday, 3 January 2021

New additions for my table

Hello and welcome back.

I had some Amazon vouchers burning a hole in my pocket from Christmas. So I plumbed for some gale force 9 Aliens stuff. 

First up is these assets and hazards.


They will be handy for adding dressing to bunker/vault explorations. I may try to make a press mould of the face huggers so they can be used to decorate various bits of terrain. The set may also make good dressing for those folks with a thing for the Necromunda Underhive or Judge Dredd/Strontium Dogs settings.
As if the denizens of Mattblackgod’s world don't have enough problems I also got these:

Each alien body has a option of two heads, which the spares may also be useful for set decoration. Or possibly a head swap with a genestealer. As I also have the Warlord Judge Dredd set still to paint I guess I will be able to run some Dredd vs Aliens games. 

The figures are 30mm and are multipart hard plastic. So they should fit nicely with the rest of my 28mm stuff. 

As the prices aren’t too bad I ordered the Queen and Solaco set with the lifter. £12 for the queen compared to £30-ish for the 40K ambull. No brainer really. Although a quick google search had the dreaded Ambull sets are currently coming in at a whopping £120!! Are people mad?? 

I guess that my figure buying embargo for 2021 has gone south already. 


Thanks for looking. 

Take care out there and remember they mostly come at night.....mostly.  


Friday, 1 January 2021

Happy New Year 2021


Happy new year to all my readers. Let’s hope 2021 is a better, brighter and more stable year for us all. 


Believe it or not I have some plans for 2021 although I suspect that they may only last a few weeks before I get distracted. The overall plan is to try to hit similar painting numbers as 2020, that is at least 2 figures a week. I also plan not to buy any new toys, however we like last year I doubt I will last long on that one. Especially with Stargrave lurking on the horizon (a space variant of Frostgrave). Although my collection probably has enough figures to cover this game. 


Mattblackgod’s world:

Setting may need more melee figures. I figure after 100 years firearms would start to reach non functioning levels. There would also be a drop in available ammunition. A couple of years back I knocked together a load of PA melee figures from various kits. Hopefully I can get to them. 


2000AD:

At the end of last year I picked up the Warlord Judge Dredd set so there is a fair amount of figures to paint up for that. In addition I still have half of the Strontium Dogs figures to paint up. The good thing is that many of the figures in both sets are compatible. My PA setting is futuristic so the figures can fit into it as well. I will hopefully be able to run a figure comparison post to Mongoose’s 2000AD figures. 


Dreadball:

I have some extra Dreadball teams to paint up. There is the Dreadball Extreme set up get paint on too. It is a street version so there are booby traps and other hazards that don’t turn up in a Dreadball league game. It looks to be a fun variation.


Mytharth:

Mytharth is my own fantasy setting designed to run with Frostgrave games. There is a bunch of resin barbarians in the paint queue waiting to become a warband. My collection of unpainted Wizards has grown too. 


Zone Alpha:

Not much needs doing for Zona Alpha. I have plenty of figures and terrain to cover everything. That’s the advantage of being a fan of the Stalker and Metro computer games. Over on Facebook the Zone Alpha group has a competition to build a zone anomaly running throughout 2021. So I am planning on building at least one.


Oldhammer:

My collection of Oldhammer figures still waiting for paint will hopefully get coloured in and applied to what ever faction on Mattblackgod’s world. Some of them may also be useful for the forcoming Stargrave game. I would love to make a Ork Slaver Walker as shown in a illustration in the 40k Rogue Trader rulebook.


Trogs/Orks:

I have plans afoot to get more Orks painted for MBW. 


15mm Post Apoc:

Inspired by the Rage 2 computer game I have figures to paint various post Apoc factions for the MBW15 setting. The advantage of these is that a few of them can be used as factions in my Wild Galaxy setting. 


Wild Galaxy:

Apart from stealing factions from my 15mm Post Apoc setting I have a few terrain ideas to pursue. I would also love to build a 15mm scale cargo spaceship from junk. A frontier world space port is another idea that I would like to pursue. 


Gaslands:

I have a large fleet of vehicles from my Dark Future, Axels & Alloys and Warlands collections. To play Gaslands all I need is some race gates. If I keep them scale neutral they may also be useful for 28mm racing games. 


Prehistorics:

I have a bunch of 15mm cavemen and woolly mammoths to paint up. Hopefully I will get to them before the year is out. I would ultimately like to do different tribes (maybe in 28mm) inspired by the Chronicles of ancient darkness series of novels by Michelle Paver. 


These novels are a excellent read by the way. 


Those are the plans. We shall see how much I get through. As a old manager of mine used to say “A plan only survives it’s first draft”. 


Have a happy, healthy and prosperous 2021. 


Thanks for reading. Take care out there. 

Wednesday, 30 December 2020

2020 rear view


2020 has been a strange year filled with trepidation, confusion, unexpected challenges, restrictions, idiots, loony politicians, facemasks and wayyy too much time at home. One thing it has proved is that human stupidity is able to spread faster than any virus. 


While 2020 has had its challenges it’s not been all bad for me. The lockdowns has helped me to get some decent hobby time in. This year’s hobby tally is:


Figures painted: 100

Figures reworked: 22

Terrain finished: 32

Terrain reworked: 1

Vehicles finished: 2

Vehicles reworked: 0


Not a bad tally, that is nearly two figures painted a week which was my aim this time 12 months ago. Especially when I think that I have had a few weeks of mojo loss here and there. The tally has been massively helped by painting some 15mm scale. There is has been a fair bit of terrain knocked out too.  I even got a game in! 


The hobby bingo card got to about 85% complete. I missed painting a 20mm figure, convert a Hotwheels and convert a 10 figure (plenty of these still available should anyone want one!). The hobby bingo card was a good way to stay focused but I doubt I will keep it up in 2021.


Despite the lockdowns I didn’t get half of what I had planned hobbywise done and it didn’t take long to fall off the no purchases wagon. Saving money on the commute to work did allow for a few new purchases. 


That’s all for now....If I don’t get a chance to post....


Happy New Year, I hope 2021 is a better, more stable year for us all. Hopefully we will get a break on the war on Covid 19 and we can return to a more normal life. 


I hope you enjoy bringing in the new year in whatever way you choose. That’s if you don’t choose to spend it with the lights off hiding behind the couch, which looking back is perhaps how we should have all celebrated 2020 new year! I plan to spend the new year relaxing, eating cheese, drinking beer and watching a die hard marathon. 


Stay safe and healthy. Catch you all in 2021! 


Wednesday, 23 December 2020

Tales from the Toxic World.

Tales from the Toxic World is a book of short stories from the Toxic World Series of novels by Sean Mclachlan.


I am a fan of the Toxic World setting & novels. I would go as far to say that they are my favourite of the Post Apocalyptic genre. These short stories are set in between Radio Hope and the Refugees from the Righteous Horde books but do not contain any story spoilers from the main series of novels. Although they do feature some of the characters. The book also introduces a new setting/township Tiretown. I do wonder if Sean Mclachlan is going to feature this town in the future of the series somehow, although he does state that Tiretown and New City (the city central to the Toxic World Series) are unaware of each other’s existence. Maybe it will get its own novel? I hope so as the Tiretown story was a gripping read. 


All the stories are great, they add extra depth and colour to the Toxic World. Some of the stories make for good plot hooks for Post Apoc RPGs. 


If you want to read some good post apocalyptic short stories that aren’t the usual run of the mill PA stories then I recommend this book. 

Merry Christmas

Happy Postapoc Christmas to my readers!

2020 has been a weird year, I wish you all have a safe, healthy and happy Christmas (or other applicable holiday). 


May Postapoc Santa bring you good scavenging and loot while keeping the plague away!

Have a good one! Stay safe out there Wastelanders! 

Saturday, 12 December 2020

Trash Bash Tutorial.

Hello and welcome back. In this blog post I will be running through a step by step trash bash tutorial to make a Sci Fi building. 


This tutorial is aimed at newbies to one now often neglected aspect of our hobby, trash bashed terrain. 


Trash bashing is using stuff that would normally be thrown out or put into the recycling bin. Cardboard, packing pieces, bottle tops, containers, bits of kits, old gift cards, drinks cans, food cans, model sprue and broken toys and more can be used to build a model. 


Now I can hear some of you asking, with the massive array of plastic, mdf and resin models available, why bother trash bashing? Back in the day it was the only option for many of us. Vehicle kits were limited and terrain kits non existent. Resin models were limited too and expensive. So many wargamers had no option but to build their own. Many Sci Fi films and shows had models built in a similar fashion. It was fun playing identify the parts on the models on screen. 


However what I tend to see now is tables of models which are starting to looks a  bit samey. A trash bashed model or two adds variety to a table. Trash bashing is fun and helps the environment by up cycling/recycling stuff that would end up in land fill or burnt in a incinerator. 


This tutorial will use trash items only but that isn’t to stop you using bits of kits especially if they help theme the terrain to your armies or table style.  To speed things up there are also suppliers of wonderful bits to help make your trash bashes look more convincing. 


Items needed: plastic food container, corrugated cardboard, thin cardboard (cereal packets), plastic or card gift cards, bits of old pens, model sprue, sand and a variety of junk from the bits box. I will also point out some of the errors and things I have learnt during this build. 


Tools needed: hot glue gun, super glue, pva glue, hobby knife, sand paper.


Step 1. 

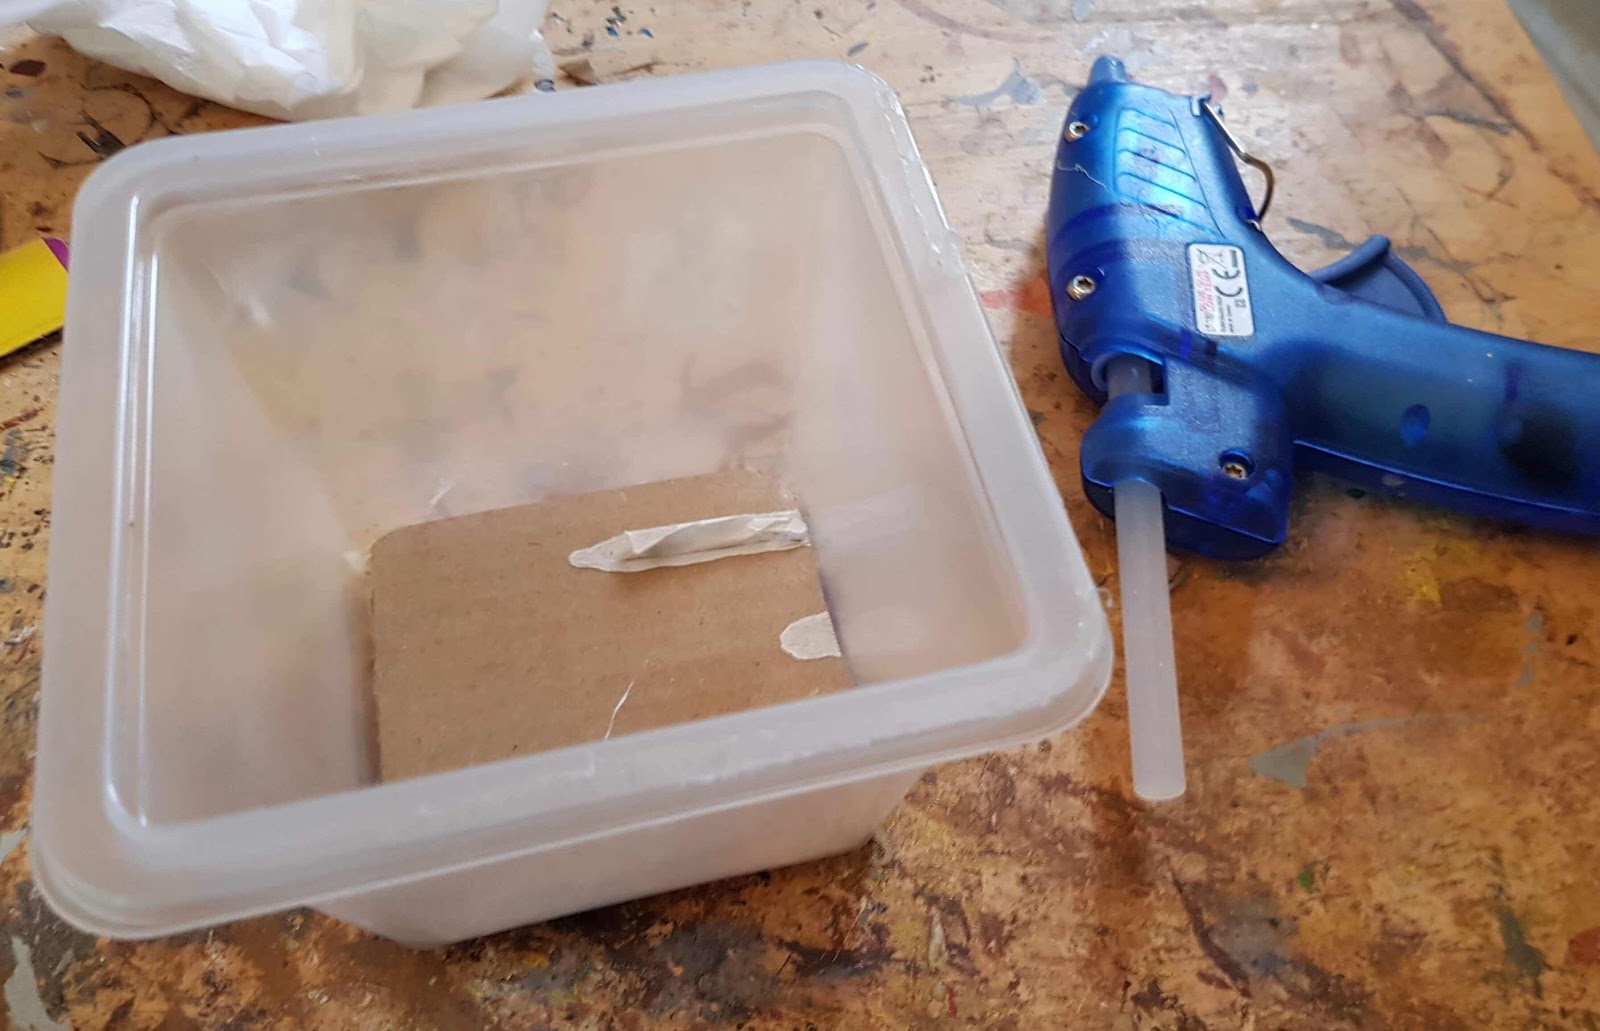
First we need a food tub. This one had rice in it. Consume the contents or wait until some else does. Wash the tub to clean the insides and remove any stickers/labels. 

Tip: Some labels can be left on the container as they can add to the sci-fi panels look.


Step 2.

Once you have a shiny clean tub, it needs reinforcing. The plastic is often too flimsy to work with. There are a few ways to reinforce plastic tubs. Plaster of Paris (which would make it heavy), paper mache (great for curves and irregular shapes but can take a while to dry) or bits of corrugated cardboard. I chose the corrugated cardboard option. Cut to shape and hot glue to the insides of the tub.


Note - do not be tempted to use expanding foam for sealing holes in buildings on plastic containers. As it expands it deforms the plastic. It is great however for reinforcing pressed cardboard packing pieces. 


Step 3.

Many plastic tubs come with a folded lip at the top which acts as a reinforcement for the tub. They can be filled with putty to give the impression of bumpers or crash defences. Some people like the lip but I am not a fan. Carefully cutting away from myself I trimmed the lip off. 


This creates the problem of making the tub even more flimsy. I got around this be glueing the tub to a corrugated cardboard base. 


Step 4.


Next up lightly sand the tub. This acts as a keying for the glue and paint. Don’t go too heavy as it will damage the tub. 
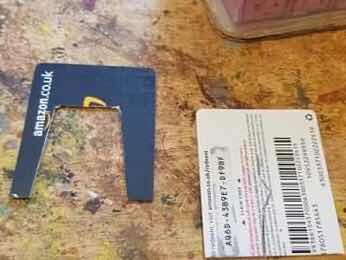


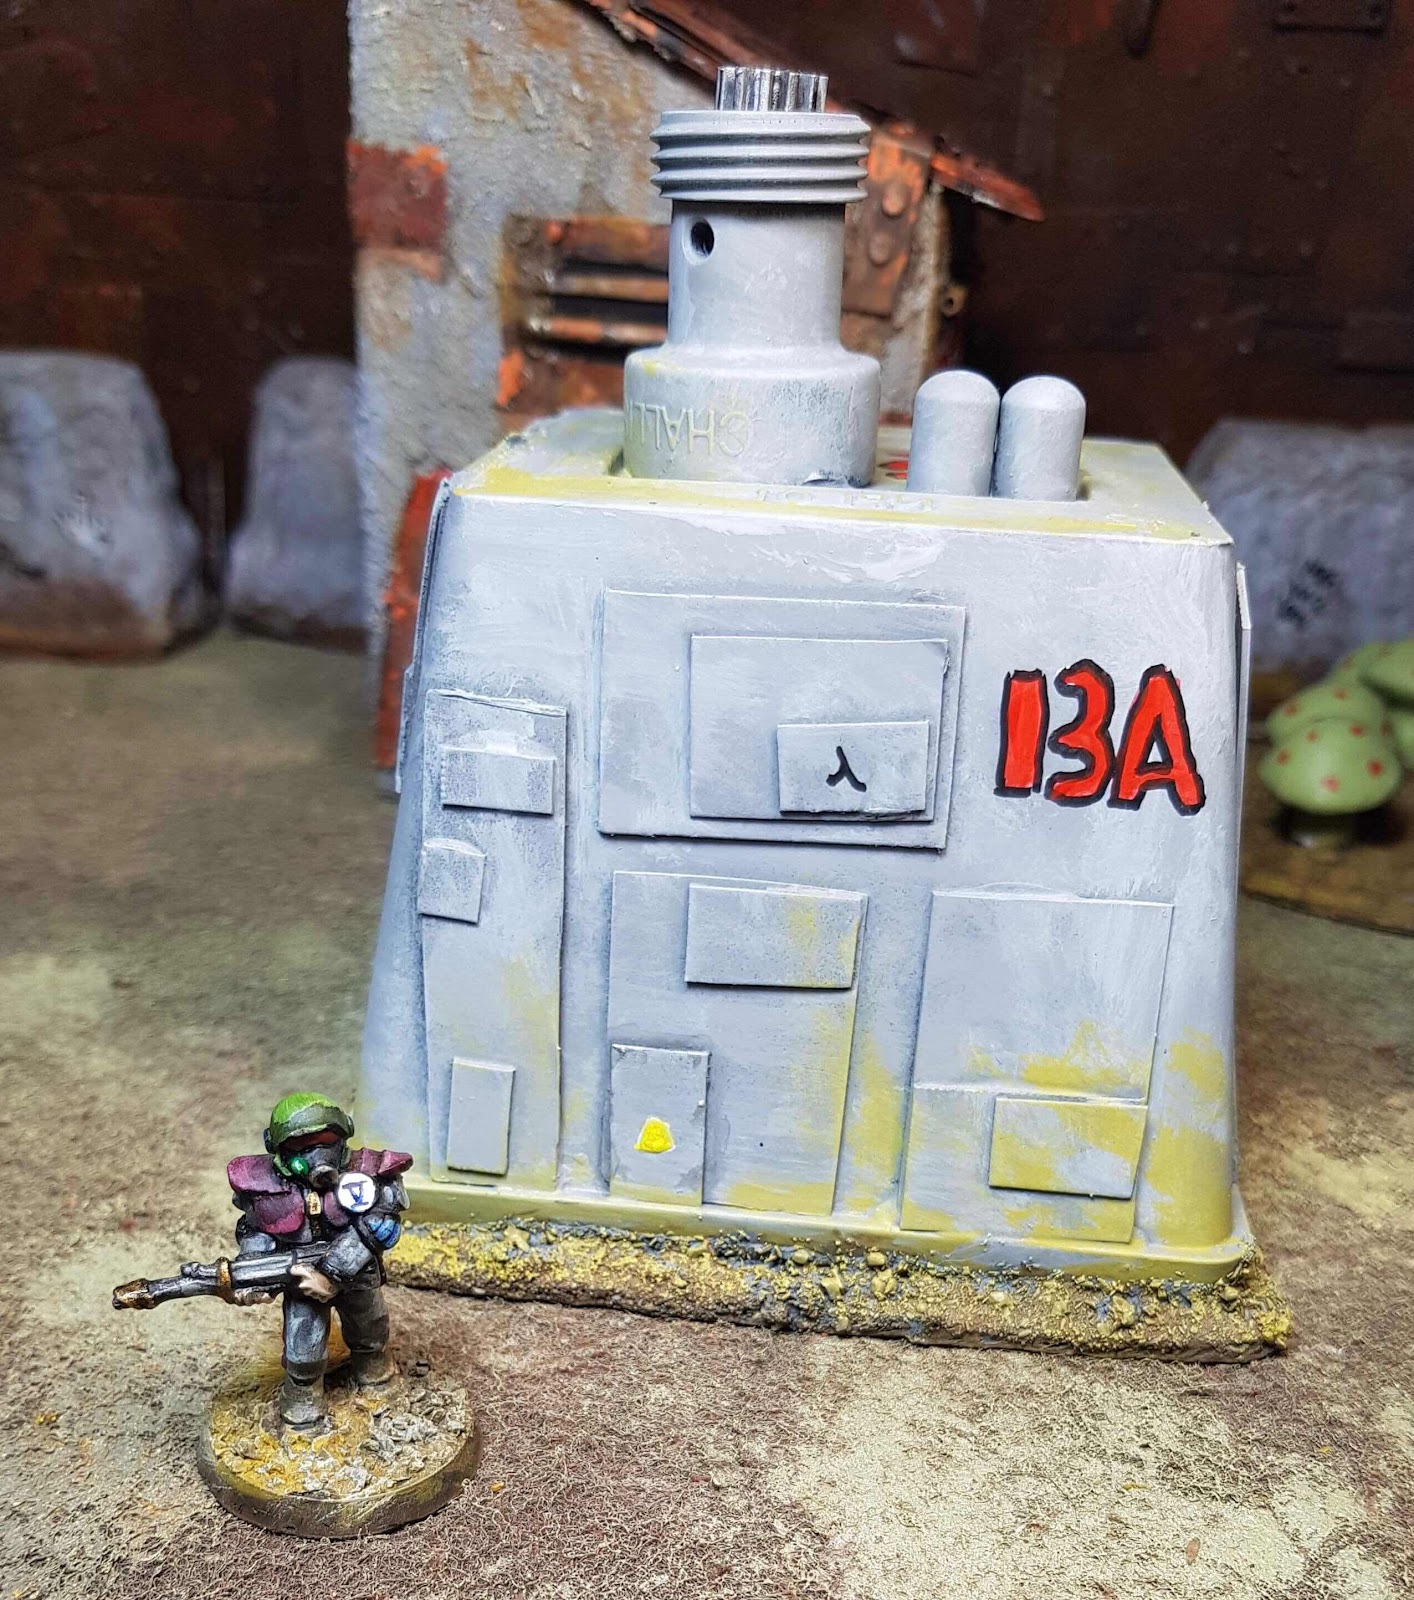
The door is carved from a cardboard gift card. I have learned the hard way from this. These gift cards are made from laminated cardboard and they are difficult to cut patterns or shapes in them. 
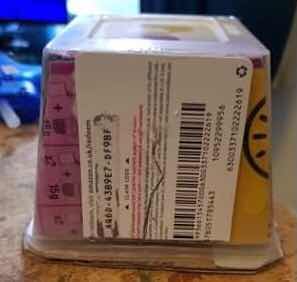


The internal door is cut in a Sci Fi shape. The other card is makes up the frame. 


Step 5. 


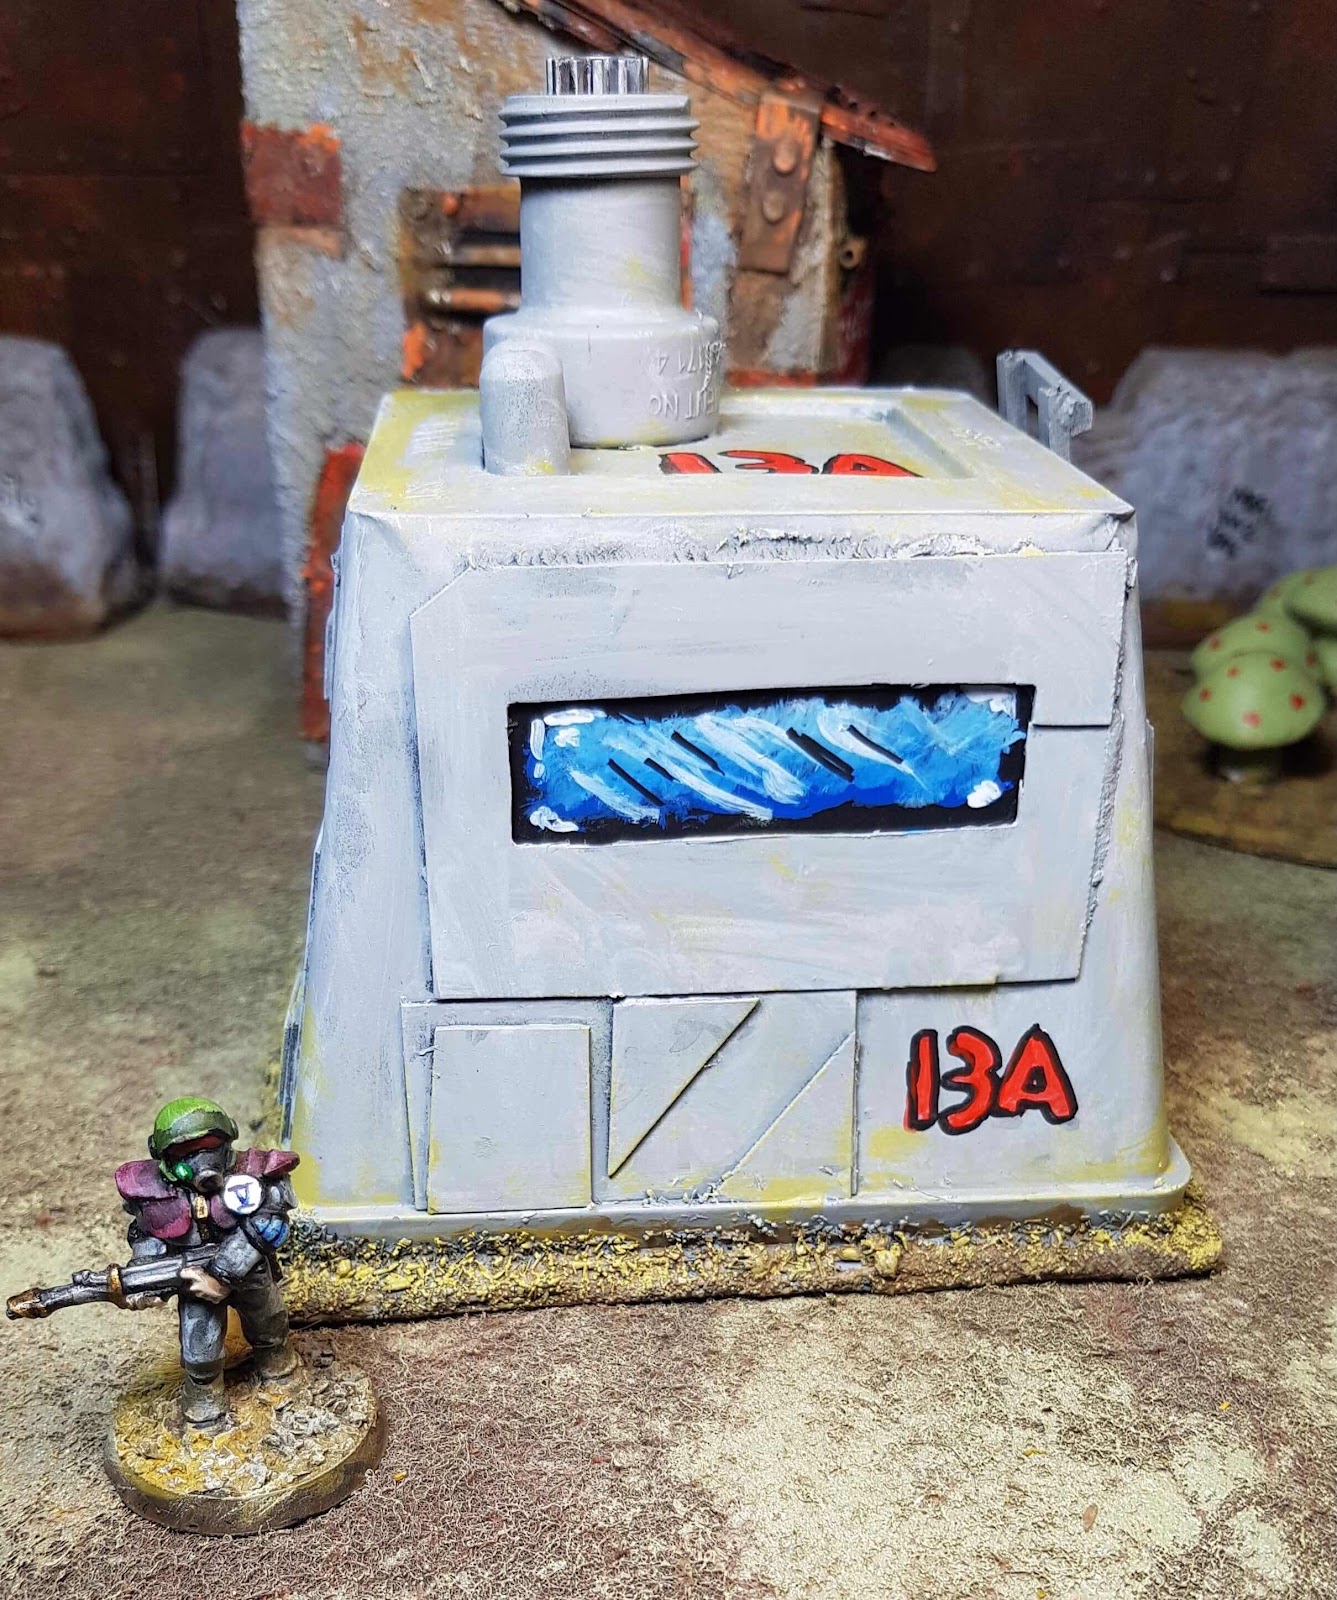
The window is carved from a gift card. The card split when cutting it. In retrospect cereal packet card would have been more suited to making the door and window. 
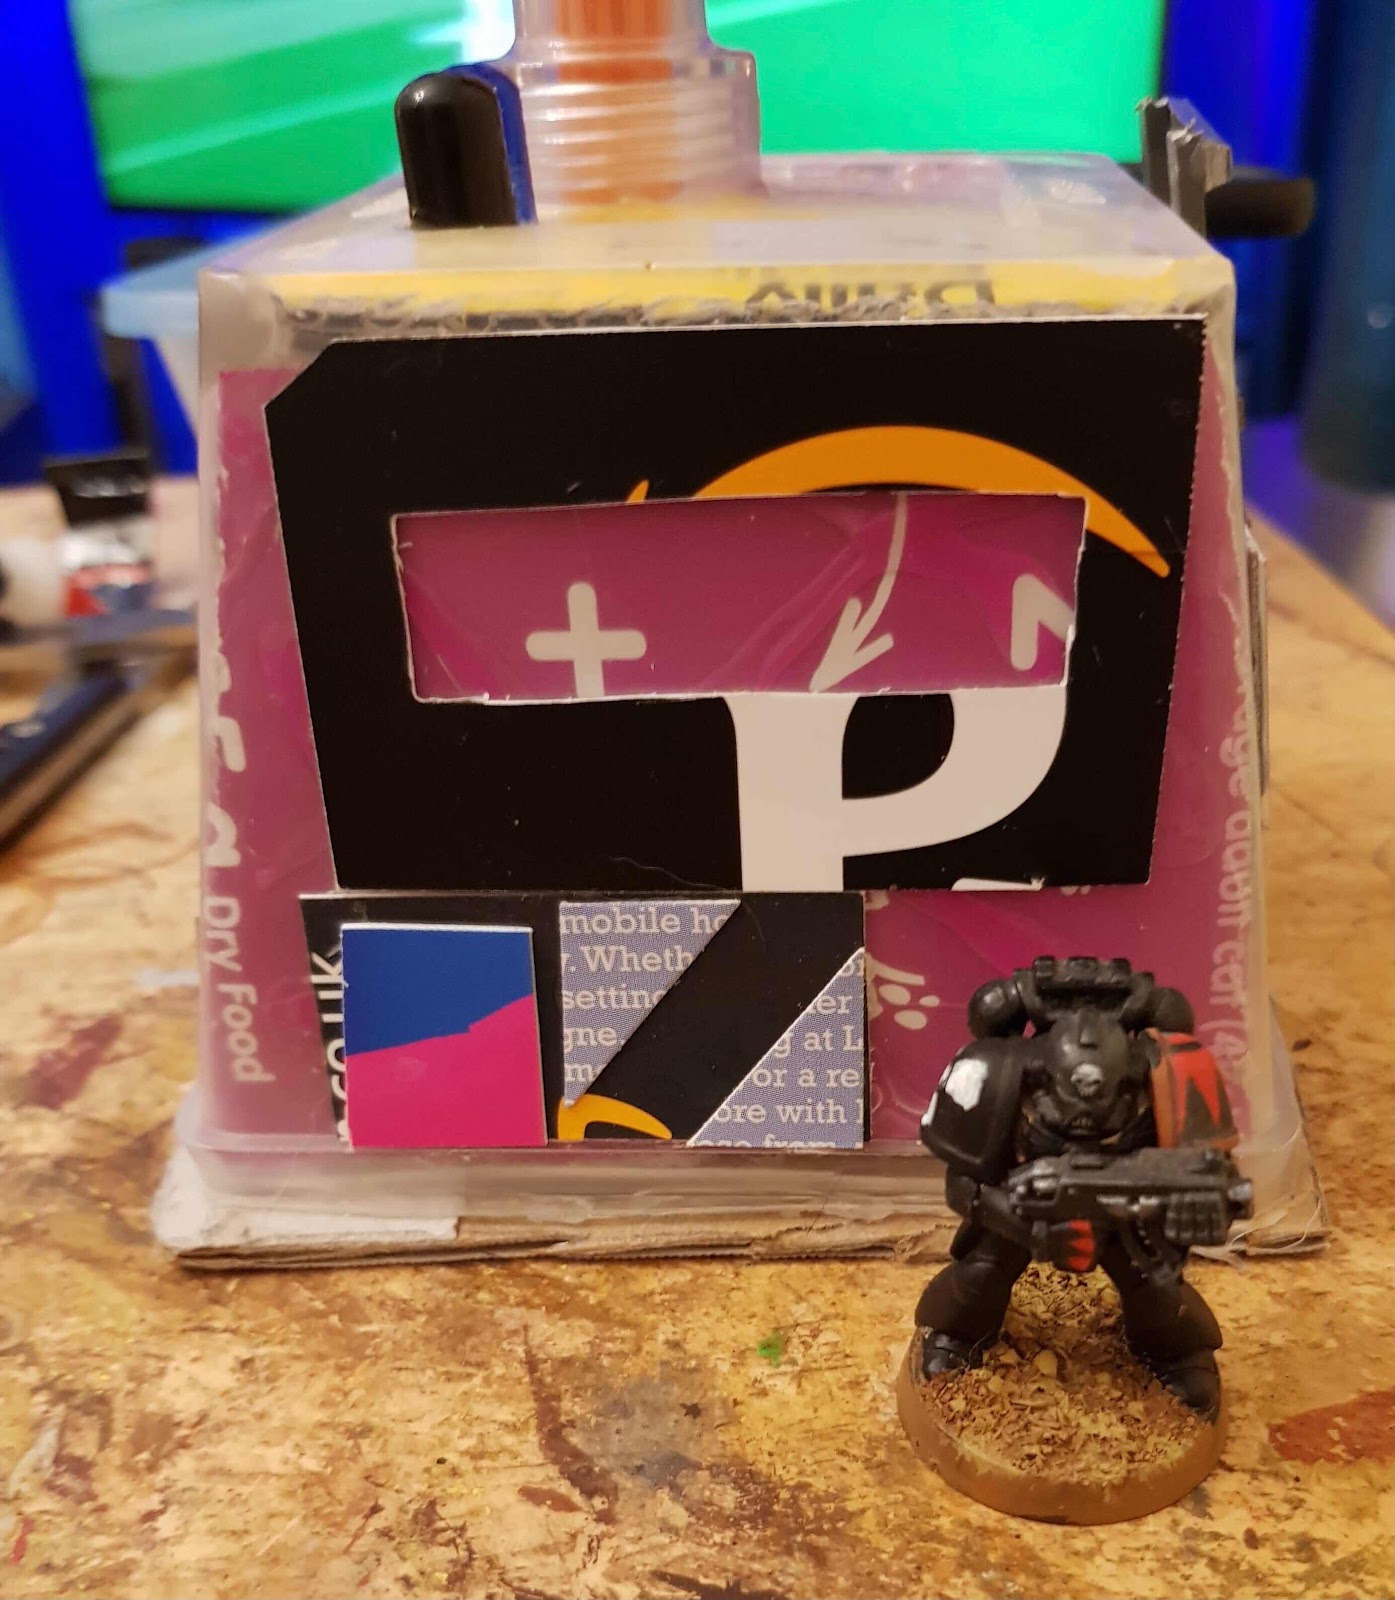


Step 6
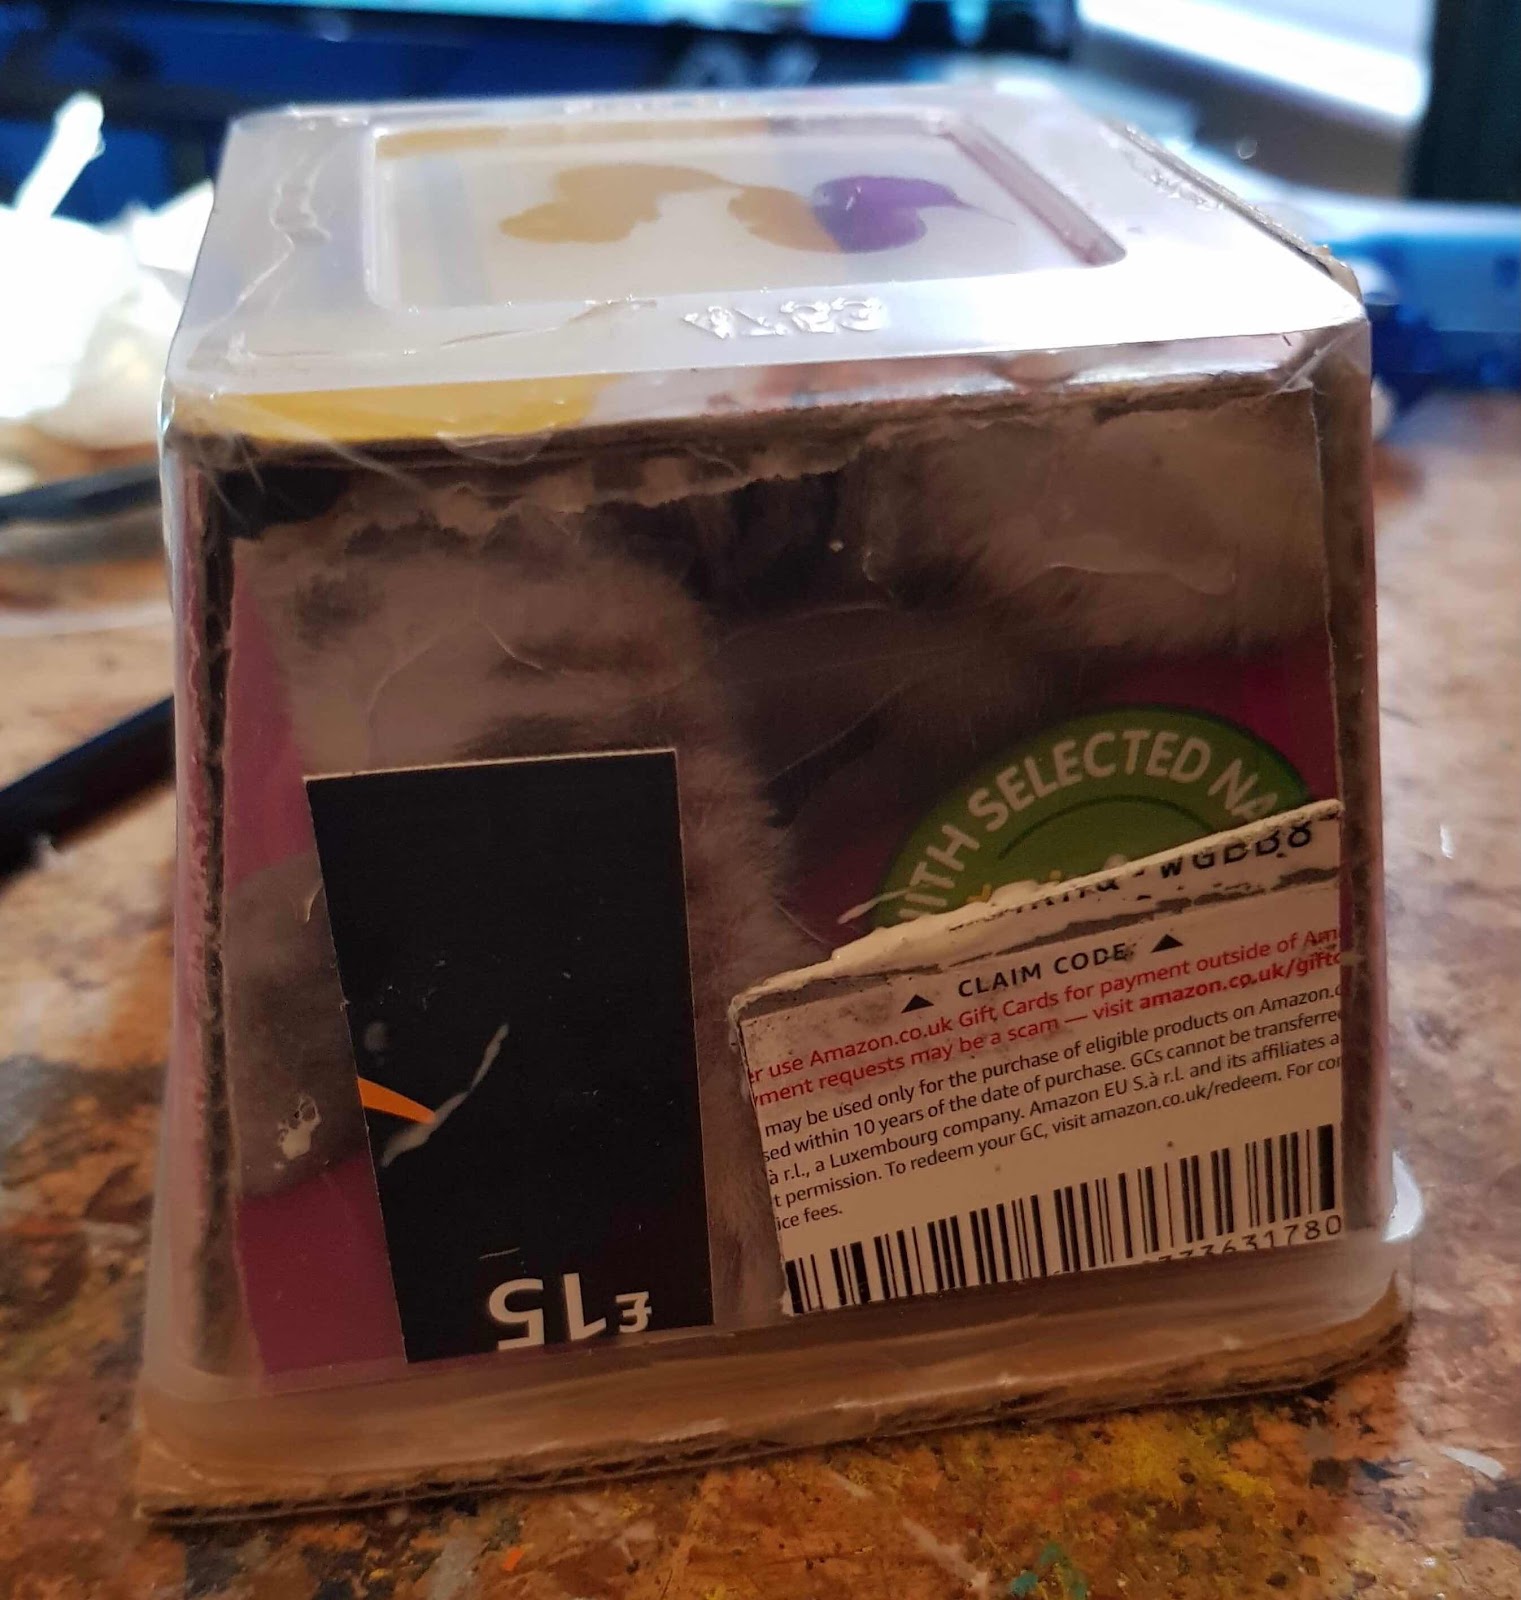


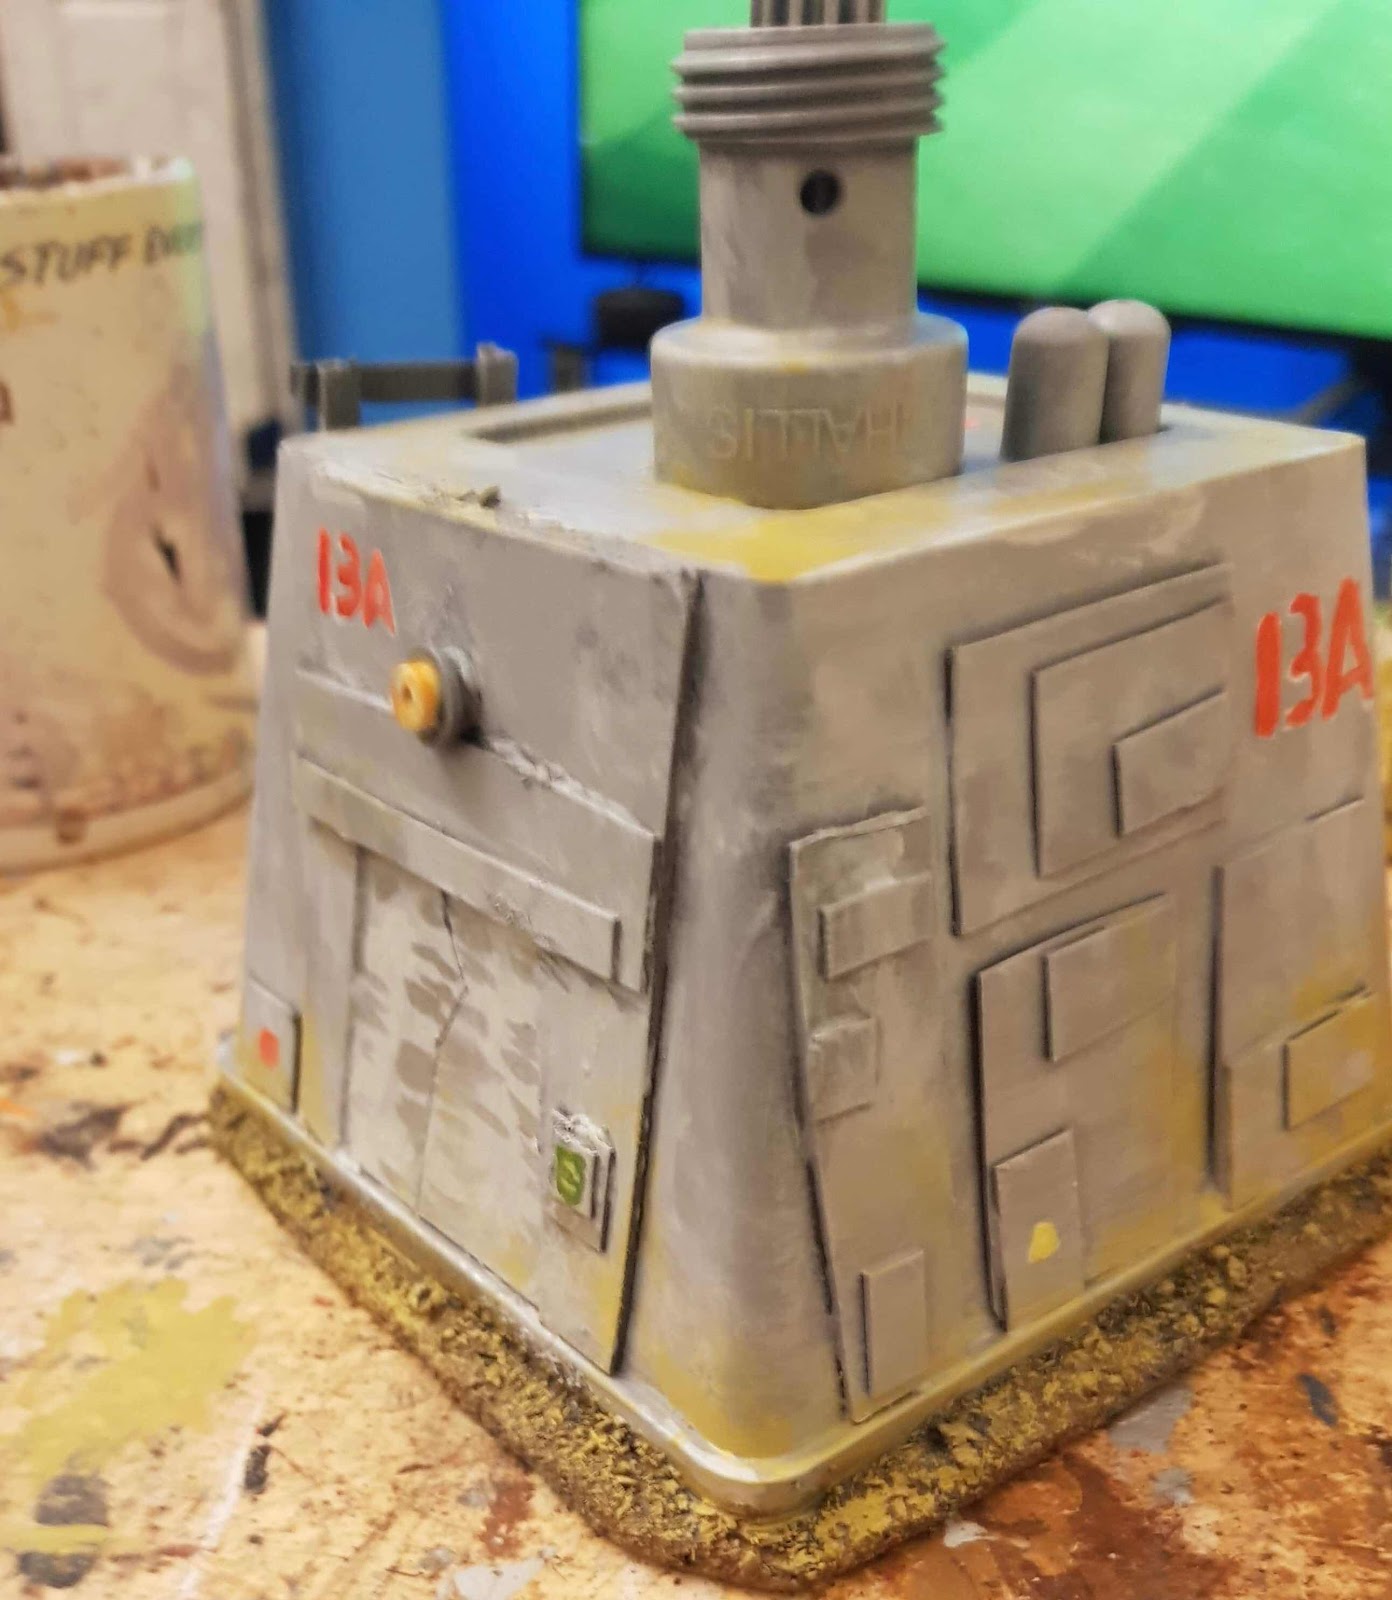
The tub is covered in cereal packet and gift card panels of different sizes and shapes.

The door frame has a panel made from card and a lintle. The light above the door is a bit of Lego.
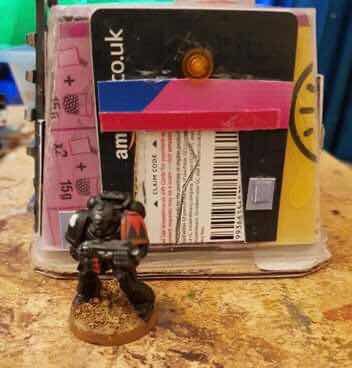


I decided that a ladder would be in order so figures can get onto the roof. I constructed this from lengths of sprue with rungs made from sprue. 


The roof detail consists of bits of pens, a pen top and some plastic threaded do daa salvaged from some toy set. 


In my wisdom I filled the crack above the window with putty. In my rush to finish I neglected to sand it smooth. The base had some sand glued on using PVA glue. 


Step 7. 


Once happy with the build I undercoated the model with grey paint. I use cheap auto primer. Do this in a well ventilated area and away from naked flames. If you have respiratory condition wear a respirator or similar. 


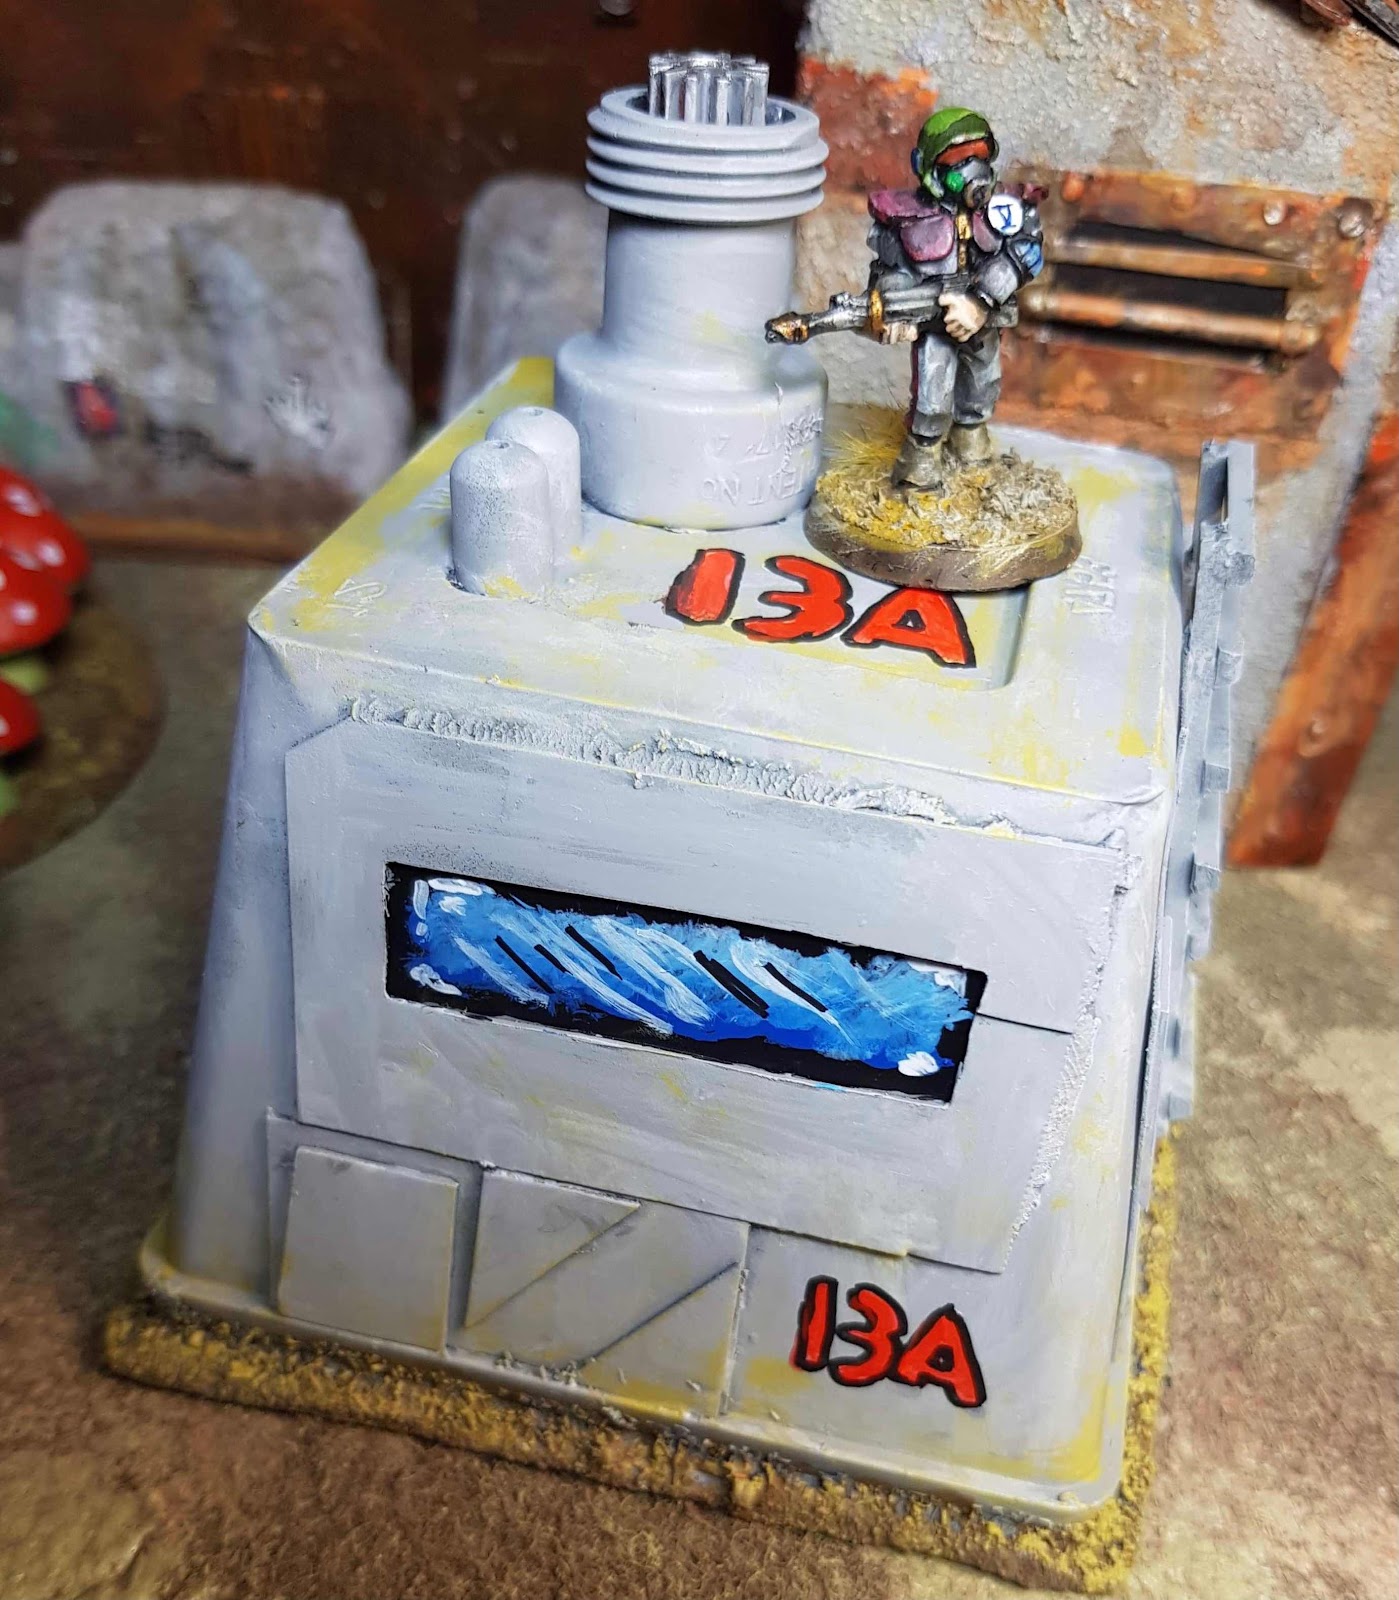
The model was then dry brushed with a mid grey and then highlighted with a light grey. A dark wash ties it together and makes the details pop. The window was painted black then  had a blue painted over it leaving a thin border of black. Light blue was painted along the top of the dark blue. Add some highlights in white here and there. 


Paint details such as control panel labels, numbers and hazard stripes. After this it’s weathering time. Don’t go too mad. It depends on where this building will live. Different environments will weather a building differently. An old building will tend to have heavier weathering. 


For this building I dry brushed some base colour along the bottom of the model. A lighter coloured and lighter dry brush was applied to the whole model. 


I hope you have enjoyed this tutorial. Now get trash bashing! 


Thanks for reading.