Showing posts with label Terrain. Show all posts

Saturday, 20 June 2026

Dodgy's Bar Rework

Hello and Welcome back, 

A long time ago I built some sci fi buildings from junk, intending them as scenery for Judge Dredd games. It was a time before I began weathering models. Being a fan of 80s 2000AD I went for a bold colour, blue in this case. After a couple of games they sat on a shelf. 

The Batrep for your entertainment: https://mattblackgodsworld.blogspot.com/2014/03/trouble-in-utopia-city.html
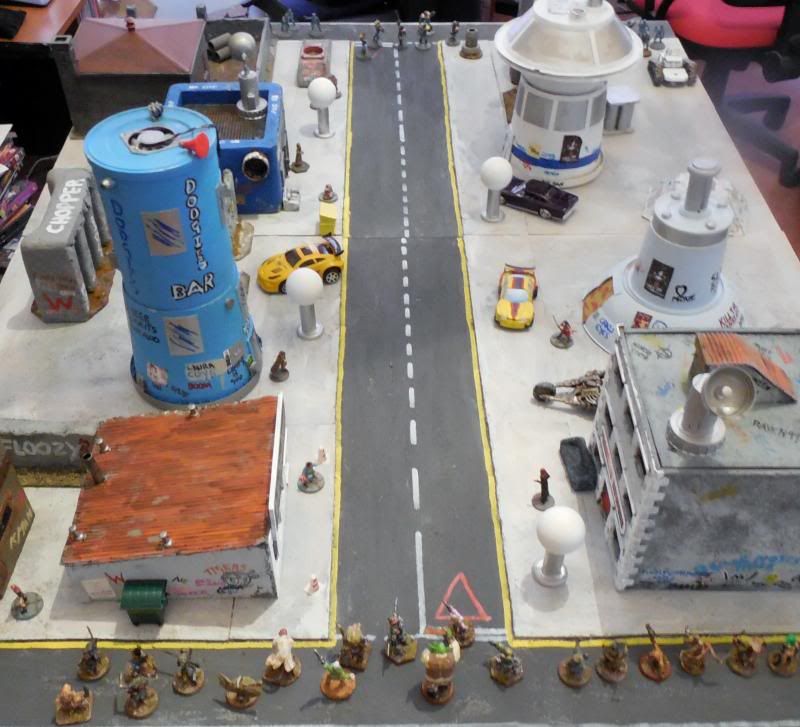
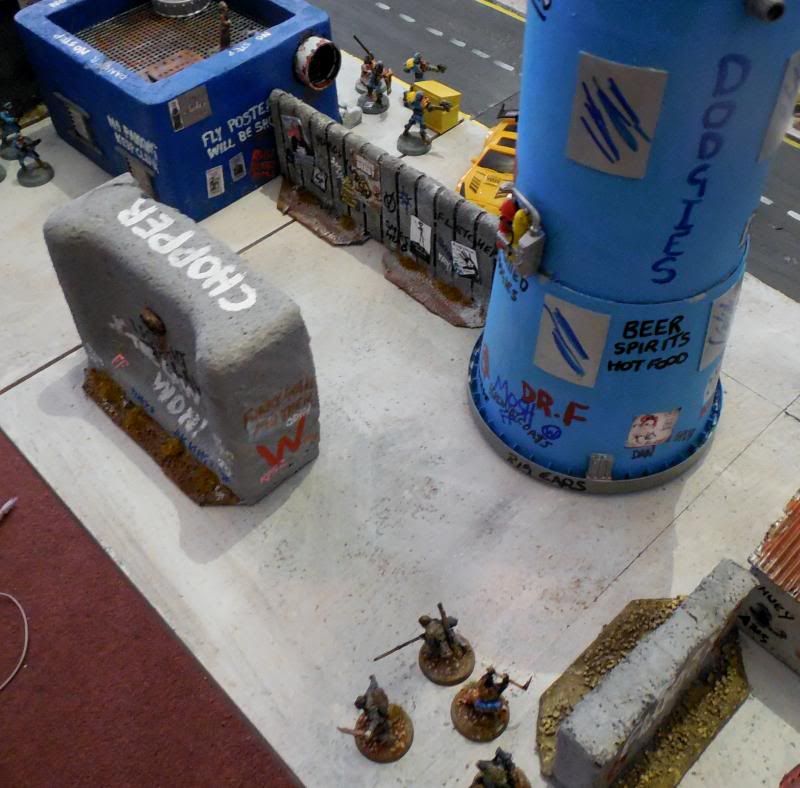
You can see Dodgies Bar on the left there


Another angle of Dodgies Bar

I was thinking of reworking Dodgy's bar for some time. One idea was to update the sign with letters. Intially the bar began life around Christmas time. The lower half was a plastic treats tub that held some chocolate treats. The upper half started life as one of those tubs that dry roasted peanuts come in. The door and windows were made from cerial packet card. 

The letters were made using a silicon bakers letter mould and eva foam clay. Its an idea I will reuse for other models. 

After fitting the letters, my brain started thinking that the clean look would out of place on my current terrian styles. My thoughts were to make the bar look more like it was built from scrapped or wrecked space craft, on some galactic backwater dump.

I started by carving panel lines into the model. Being me, I added the lines by hand using the blunt side of a scalpel. It went wrong with wonky lines everywhere. Doh. 

As a fix, I began adding panels made from cereal packet cardboard and plastic food trays that cakes or biscuits come in. Some extra greeblie bits were also added.

There is some strange people out here.

Up top I added cables, struts and conduits to make it look like this was a peice of a space craft hull. A comms mast made from plastic rod and some beads was also added. I figured the paterons may want to stream sports games or news about which empire is picking a fight with their neighbours because they once looked at them funny. 

To make the model more interesting for table top tacticians, I added some ladders and platforms to the bar. You can now ambush drunks leaving the bar from above. Or enterprising snipers can hide on the roof to command the battle field. Just dont get too close to that big cooling fan blade up there. 

Paint wise, I decided to go with space ship colours, dirty whites mainly. Lots of weathering was added and followed up with new posters. The graffiti artists didnt take long to daube the bar. 

I have enjoyed reworking the bar. I will need to create a Dodgy character for the tabletop at some point. The other buildings I built for that Mega City One table, are waving at me to be reworked for a galactic backwater dump setting.


Thanks for reading, 

Stay safe out there or come visit Dodgy's Bar, where the beer is warm and the scowls are genuine.


Tuesday, 9 June 2026

Terrain Posters WIP 2

Hello and Welcome back,

I have made a little more progress on the posters. I have added some colour. 


That reminds me, I need to get a character figure kitbashed up for Milky.

These two were also drawn up and are in the middle of having colour added. 

Old Kosmik's "business":

https://mattblackgodsworld.blogspot.com/2022/08/kosmiks-sweat-lodge.html

Hopefully I can get some more drawn up soon. The ideas just keep coming. The side effect of world building I guess. 

Stay tuned and keep safe.


Tuesday, 2 June 2026

Terrain Posters WIP

Hello and Welcome Back,

Yes, I am still alive. Things have been insanely busy since my last post. I have been hobbying but I life is keeping me busy too get to blogging. My usual issue is getting pictures organised. Hopefully I can catch up soon. 

Meanwhile, I have begun drawing up posters for my terrain. 

So far there is a advert for Big Milky Tours and Old Crustys Fungus Ale. The idea is to make posters that will fit frontier world and post apocalyptic models. 


Once these are cleaned up, some colour will be added. Maybe some aging. The plan is to scan these in and drop the image into a document file, shrinking the size to suit the scale. Hopefully this will hide just how bad the art is. 

Once printed and cut out, they will be glued to various models. One thing is that it has given me lots of ideas for more. Keep watching for futher progress.

Thanks for looking,

Take Care out there.


Sunday, 5 April 2026

Fantasy hovels.

Hello and welcome back,

Happy Easter time, if you celebrate it. 

Time to visit my fantasy hovels, they took long enough to finish. They began life as a cardboard box, a cerial packet and some scraps of blue foam.


Now they look like this. 


I added bases so I could add some extra ground work and little details. The bases are vinyl floor tyle. The windows are made from various cake and biscuit packets. 


The pitchforks and spear came from some spare GW fantasy zombie arms. I was surprised  just how easy it was to remove the arms and hands. 


The barrels came from a rendera barrel set. 


The rocks are from self adhesive tuft sets I have had laying about for years. 


The best thing about these models is that they are cheap to make.


Thanks for looking,

Take care out there.

Saturday, 31 January 2026

The End of January at last!

Hello and Welcome Back,

It’s the end of January, so it’s time for a catch up.

I don’t know about you, but for me January this year feels like it was 4 months long. It’s been a busy month with one thing and another.

As you might have noticed, I still haven’t caught up with the blog posts from last year. I will get there. The half-written posts on my device are annoying me.

Hobby wise the fantasy bug is still gripping me. I assembled some Lasers and Blasters Fantasy villagers. The box has 60 figures which will flesh out my setting. There will be another post as soon as I get some of them painted.

I have also started some fantasy terrain, mainly village houses. These are made from corrugated cardboard.

The chimneys are made from some blue foam I had laying about from another project. Drinks stirrers and cereal packet card make up the beams and roof tiles respectivley.

The roof tiles took most of the week to cut up and assemble. I thought it would be a rather tedious task, but I found it strangely therapeutic.


Now, I have the fun parts left to do – the details. More terrain posts to follow.

Thanks for reading, take care out there.


Friday, 30 May 2025

Rusty Scrap Piles

Hello and Welcome back,

While useful for a Post Apocalyptic setting, I made 6 of these rusty scrap piles as objectives for the Skirm game. A further 2 were made and a larger pile as terrain was also produced as I was in the zone. 


The objectives were based on 50mm bases. Skrim needs 25mm but I thought that would be difficult to make a decent looking scrap pile on such a small base. The inspiration for making these models came from a Bill Making Stuff video on YouTube.

All of the scrap piles started with a pile of tin foil flattened to make a heap shape. These were then superglued into position. Hot glue may have been a better option as the glue would have filled the gaps between the base and foil heap.

Then piles of junk salvaged from the bits box (in this case bits of hexagon platformer kits, cut up plastic junk, on toy bullets, model kit parts, figure casting tabs by Ramshackle games, model missles, bits of wire, 1/32 car wheels and other scrap) were then hot glued onto the piles in a random haphazard fashion.

The piles were primed with Matt Black (what else?) spray primer. When dry the piles were given zential priming with white spray primer. The whole thing was painted in textured paint which was a mix bicarbonate of soda, dark brown craft paint and pva glue in equal parts. This takes a while to dry but gives a nice old rusty pile effect. 

The piles got some orange and brown spots added and some light rust paint (army painter). A dark wash was added to make the details pop, such as they where.  

The bases then got a coat of textured paint which is a mix of bicarbonate of soda, fine sand, course sand, pva glue and yellow ochre craft paint. I tried to get paint on other areas of the models as sand gets everywhere. Once dry they got a Coat d arms Bone drybrush. 

I added some flame grass tufts as I figured anything growing would be contaminated by the rust. 

These piles were quick and easy models to make. It is deeply satisfying raiding the bits box and grabbing items of plastic to cut up to make junk. I recommend it. 

I have plans to make larger peices in future. Time to get those bits box emptied! Although I can guarantee that I will probably want those bits for another build a week later.

Thanks for reading,

Take care out there.


Sunday, 4 May 2025

Dusty spaceport town building Pt 2

Hello and Welcome back, 

Some progress has been made on the peices I started back in this post.

The ruined walls got a dry brush of Coat d Arms sand while the coated portions of the wall got a dry brush of Coat d Arms Light grey. They then whole of the models got a light drybrush of Coat D Arms Bone. I like it as it gives everything a nice dusty feel. 


Here are the finished power generators. 

All the other buildings also got a dry brush of Coat d Arms sand followed by a light drybrush of Coat D Arms Bone. The bottoms of all walls got a drybrush of Barbarian leather to give a dirty appearance to them. 


The pipes and control panels were picked out and detailed. After this the compulsory graffiti was added using Posca Markers. Posters and signs were added from pictures I had printed off. 
I fancied some graphics on the building so a corner was masked off and purple craft paint was sponged on. Once dry extra graphics was masked on and white painted on. This was followed by a yellow top coat. Weathering was added.

As I want the models to look like they have a purpose I made a sign from plastic card salvaged from some packaging. Two peices were cut and glued back to back to add some lamination and strength to the sign. 

It was painted to look a bit rusty as I thought it would make a good contrast with the shiney letter stickers I picked up on ebay. I envisioned this building being a some sort of munitions dealer that adventurers (or ship's crews) could go to stock up before going off to explore the world. 

The Ammo Shack could be a interesting tabletop hazard too. Anyone hitting the building in a fire fight might cause the munitions within to explode causing further tabletop mayhem. 

The compulsory graffiti was then added using Posca Markers and posters and signs were added from pictures I had printed off. 

I have yet to decide which Fogou Desert buildings are going to be worked on next. There has been a flurry of activity digging through bits boxes looking for stuff to add details to the next bunch of buildings. 

Keep watching for the next thrilling installment of Dusty Space Port Town Building.  

Thanks for looking, take care out there.


Thursday, 1 May 2025

A couple of bits of 15mm terrain.

Hello and Welcome back, 

In addition to various bits I have been working on for 28mm, I built this pair of models for my 15mm collection from spare Robogear platformer bits. 

There is a habitation building, which somewhat reminds me of the buildings found on various worlds in the No Man's Sky video game. 

There is also a platform which can be used for defence. 

This reminds me, I need to get my finger out and finish painting my 15mm terrain from various places. 

Thanks for looking, take care out there.